Tag Archives: recipe

Image of hands holding up a sign that says BINGO with words: Food Budget Bingo plus recipes: crispy tofu, carrots, rice.

Food Budget Bingo: Cut Costs on Your Food Budget

May 2025. Grocery costs are out of control! Let’s look at some tips to help you cut costs on your food budget with Food Budget Bingo.

Contents of blog: 1. Intro: Living out of a Dorm Fridge. 2. On The Table: Crispy Tofu, Carrots, and Rice. 3. Coach's Corner: Food Budget Bingo.

What is up with appliances these days, amirite?

A brand-new refrigerator that hubs and I purchased six months ago stopped holding temp. We didn’t notice until the ice maker stopped making ice. So, it likely had conked out 1-2 days before we noticed.

Let me start with: Hi! 👋 I’m kind of strict when it comes to food safety. I had to learn about all the food borne illnesses, so… 
 
We lost a bunch of food (!!!) and were living out of coolers and a dorm-sized fridge. The repair guy couldn’t come to do a diagnostic check for 4 days. Don’t get me started on working with warranties. At the time I’m writing this, the repair guy comes tomorrow.
 
Which brings me around to everyone’s ever-increasing food budget. Losing food hurts more now than it did 3 fridges ago when the same thing happened. Especially right after a grocery trip! Back then it was irritating. These days, it hurts.
 
So, this month I am bringing you ideas to save money on food with Food Budget Bingo. There is also a plant-based recipe that uses ingredients many of us may have on hand already. It’s vegan and can easily be made with meat.
 
I know I’m getting older. But… back in my day, appliances didn’t break within the first year of having them. And if anyone has a harvest gold fridge from the 70s to sell, HMU. Those things ran like, well, a machine.
 
A balanced diet is a cookie in each hand. And a well-stocked refrigerator.” – Source unknown

Yours in good health,
Alexia Lewis, RD
Master’s Level Nutritionist
Registered Dietitian
Certified Health Coach


DYK I still have a ⭐⭐⭐⭐⭐ rating after 158 reviews?!

This month, I want to share a patient’s success story with you.
 
My patient had a goal to get his LDL under 70 in 3 months. If he did so, he would not need to increase to his statin medication. So, we targeted LDL, and I provided lab requisitions for blood draws every 30 days. We added this to his work on less restrictive dieting and food rules.

The result? He is feeling such relief from on-and-off dieting AND his LDL went from 99 to 68. Mission accomplished!

Get my nutrition tips for improving heart health and LDL.
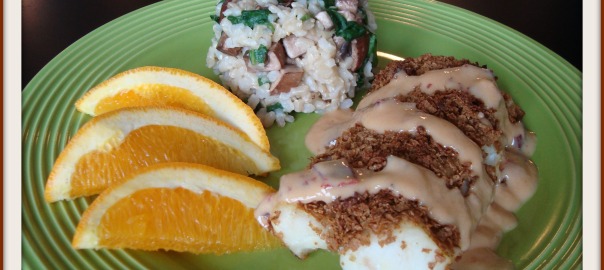
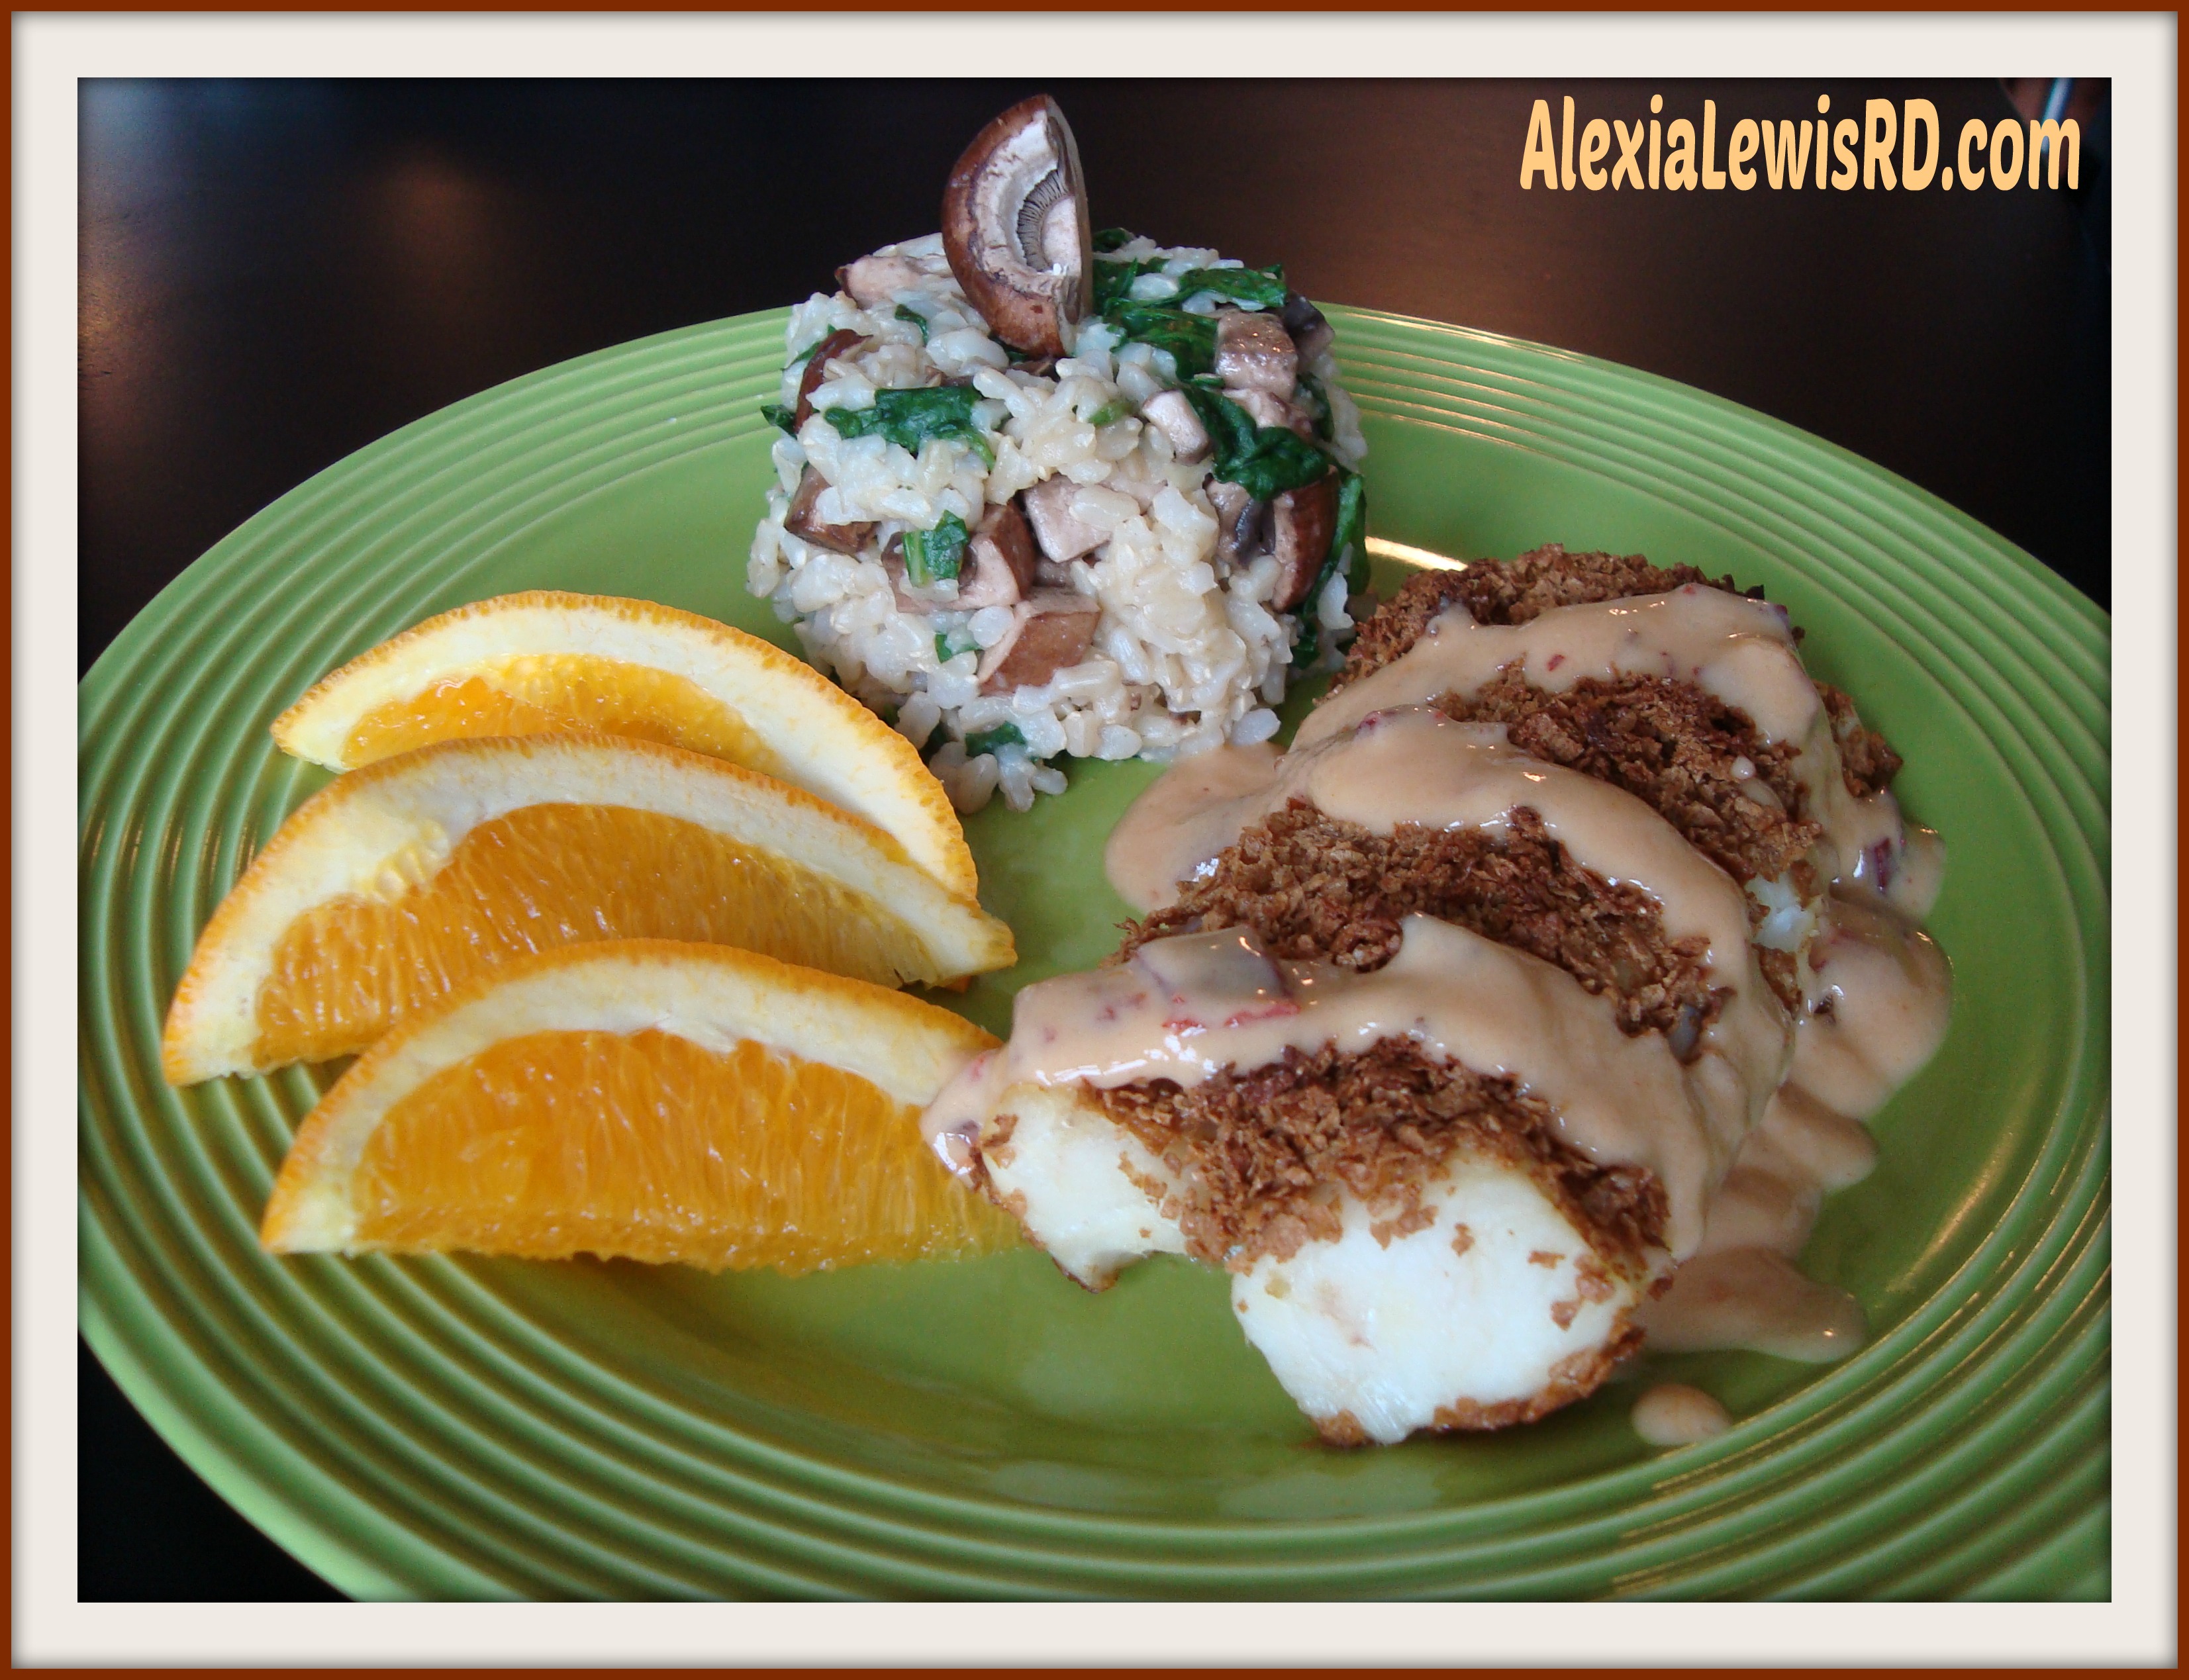

I love tofu. I know many people do not like it. To that I say, it’s because you haven’t learned how to cook it yet.
 
I’m here to help with a budget-friendly tofu recipe that uses many common ingredients you may already have.
 
For tofu, first things first. For recipes like this you need extra firm tofu.
 
Second things second. You must press the tofu before using it. Otherwise, it won’t absorb the sauce/seasonings as well and it will stay soggy and mushy instead of getting crispy. Here’s a quick web story if you don’t have a tofu press

Last things last. You must season tofu, or it tastes bland and blah.

Now, some people encourage freezing the tofu and thawing it out before using it. This is not required, especially if it puts another step between you and your tofu. Freezing will make it more spongy and crumbly, but it will hold the seasonings and flavors more.

Not vegan? No problem. Replace the tofu with the meat or fish of your choice.

Vegan or vegetarian? Get my tips for meeting your protein needs with whole and minimally processed foods.

Crispy Tofu, Carrots, and Rice. 

Makes 4 servings.

  • Cook 1 cup of dry brown rice (or rice of your choice) according to package directions. When done, set aside to cool.
  • Preheat oven to 400ºF (204ºC). Spray a large baking sheet with cooking spray (or use parchment paper if you don’t have anxiety about oven fires. Hi again. That’s also me.)
  • Press 1 package of extra-firm tofu (usually 14ish ounces). Cut block into cubes. Think bite sized.
  • In a large bowl, gently toss tofu cubes with 3 Tablespoons of low-sodium soy sauce. Add 3 Tablespoons of cornstarch to the bowl and gently toss again until tofu cubes are well-coated. Using a spatula helps with this step.
  • Place tofu cubes on the baking sheet and bake for 25-35 minutes, flipping halfway through.
  • Grab 4 serving bowls or meal-prep/storage containers and add to each bowl:
    • 1/2 cup of mixed greens
    • 1/2 of a shredded carrot
    • 3/4 cup of cooked rice (once cooled)
    • 1/4 of the tofu cubes (once cooled)
    • 1/2 Tablespoon of lemon juice

To meal prep:

  • Batch-cooking style: cook rice and tofu, store it in fridge until ready to make meal.
  • Cook-and assemble style: follow recipe, store meal-prep containers in the fridge.
  • For both styles: if not eating within 3-4 days, freeze it. Thaw when ready to eat.

If the rice or tofu needs more time to cool, place it in the refrigerator. Cooked rice is one thing you don’t want to leave on the counter too long because Bacillus cereus. This little bacterium loves cooked rice and pasta
 
Have fun and prevent food boredom with variety. Add more non-starchy vegetables. I like broccoli florets or summer squash/zucchini. Swap out brown rice for quinoa or basmati rice.
 
You can get another tofu recipe from one of my weekly meal plans: Baked tofu with zucchini carpaccio. Just please forgive the photography. I was still learning! Speaking of meal planning, DYK I wrote an e-book on Creating Your Own Personalized Meal Plan with Ease. You can read the beginning of the e-book on Amazon.
 
Give this recipe a try and let me know what you think! I would also love your suggestions for ways to jazz it up! Sometimes we all need a little #foodspiration.

Image of hands holding up a sign that says BINGO with words: Food Budget Bingo plus recipes: crispy tofu, carrots, rice.

Rewind a few years to when I had my private practice… I created this Food Budget Bingo game as a challenge and offered a prize to those who got bingo. No more prizes, but each spot on this bingo card provides a way to stretch your food budget.

And that, my friends, is quite the prize these days. 

Have fun!

Click for PDF to print or use on your electronic device.

Want strategies just for you to stretch your food budget while still enjoying your food? Schedule an appointment with me through Nourish.

Yes, RDs are kinda an expert on saving on your food budget. We help with finding recipes, teaching how to cook different cost-effective foods, and meal planning with your budget in mind! You may be surprised at how much this can help! So much more than doom-scrolling recipes on social or bookmarking a zillion recipes you never make. (You are not alone!).

My main jams are heart health, breaking food rules to improve people’s relationship with food, and weight loss including supporting those on weight loss medication and stopping binge eating.

If you are ready, let’s do it!

  • Click right here to go to my Nourish scheduling page.
  • Choose a date/time and start the scheduling process.
  • Before you finish, you will enter your insurance information and get an estimate of the expected costs.
  • 94% of people have no out-of-pocket costs!!

If I’m not licensed in your state, you can go to my page and click on “Find Your Dietitian.” To search for another RD. And, of course, you can reply to this email with questions or for help choosing another amazing RD at Nourish.

Hi there! I’m Alexia. I believe in science, humor, and delicious food.

I believe you shouldn’t sacrifice your mental health in pursuit of better physical health. You deserve to be both happy and healthy. You don’t have to choose just one. I’ve been working with people to improve this balance while still meeting their food and lifestyle goals since 2012.

I am a master’s level nutritionist who is also a registered and licensed dietitian in multiple states in the USA, a certified personal trainer, and certified health coach. I also invested in becoming a culinary nutritionist and weight management specialist. In other words, I got you.

Banner with the words "Alexia Lewis. The Real Deal Nutrition" with a red heart next to it.

Creating Your Own Personalized Meal Plan with Ease: https://www.amazon.com/ASPIRE-Strategy-Creating-Your-Personalized-ebook/dp/B0D3GPTC9C/

The Basics of Hearth Healthy Eating: https://alexialewisrd.com/2013/07/12/the-basics-of-heart-healthy-eating/

How to Press Tofu without a Tofu Press: https://theliveinkitchen.com/web-stories/how-to-press-tofu-without-a-press-story/

Three Whole Foods to Boost the Protein in Your Plant-Based Diet: https://alexialewisrd.com/2024/06/15/boost-protein-plant-based-diet/

Foodborne Illness Bacillus cereus:https://health.clevelandclinic.org/fried-rice-syndrome

Meal Plan Yumminess – Baked Tofu with Zucchini Carpaccio: https://alexialewisrd.com/2016/05/29/meal-plan-yumminess/

Food Budget Bingo PDF: https://alexialewisrd.com/wp-content/uploads/2025/05/alrd-food-budget-bingo-1-3.pdf

Recipe: Spicy Mexi-Bowl (Gluten-Free!)

Here is another delicious gluten-free, dairy-free, and vegan recipe. This spicy Mexican-inspired quinoa and beans bowl is a quick to prepare, heart-healthy, and nutrition-rich meal that can be made ahead for take-to-work lunches or you can mix up a big batch for a family dinner.  You could even top it with an over-easy egg and make it a breakfast (although it won’t be vegan with that egg on it!).

Spicy-Mexi-Bowl

And, before I forget – if you join up for our email newsletter before October 1, you will get a special offer on the Go Gluten Free or the Get Started Coaching Packages! Join today!

Here is the printer-friendly PDF: Recipe -Spicy Mexi-Bowl

Spicy-Mexi-Bowl

A Mason Jar Meal-Prep Workshop Recipe by Alexia Lewis RD / N.E.W. Motivation Coaching

Makes 1 serving

INGREDIENTS & SUPPLIES

1                          Mason Jar, 2-cup size

1 Tbsp                Red wine vinegar (or to taste)

1 tsp                    Lime juice

1/4 medium      Avocado (Florida), peeled and chopped

7                          Grape tomatoes, halved

1 Tbsp                Red onion, chopped (or to taste)

1 Tbsp                Jalapeño, deseeded and chopped

1/2 cup               Quinoa, cooked

1/2 cup               Black beans, low-sodium canned, rinsed or cooked from dry

1 tsp                   Cilantro, fresh, chopped

DIRECTIONS

  1. Layer all ingredients in mason jar in order listed.
  2. Store refrigerated for 3-5 days depending on quality of mason jar seal
  3. To serve, shake food from jar into a bowl, toss to combine, and enjoy!

Nutrition per serving:

365 calories, 10 grams fat (1.5 grams saturated fat, 0 trans fat), 0 cholesterol, 153 milligrams sodium, 59 grams carbohydrates, 13 grams fiber, 4 grams natural sugar, 14 grams protein.

Notes:

We recommend making four servings at once – that way you use up the whole avocado – and can cook 3/4 cup of dry quinoa which should give you about 2 1/4 cups cooked.

Recipe: Coco-Choco-Chia Pudding (Gluten-Free!)

We are so excited about publishing our first Celiac Disease ebook that we are sharing gluten-free recipes in advance of our gluten-free focused special deals for October! First up is a coconut, chocolate, chia seed pudding. So much yes!

This is one of three gluten-free, treats (snacks or desserts) we are showcasing at our next Make & Take Meal Prep Workshop but we love it so much we are sharing it with you here too. By the way, this recipe is also dairy-free and vegan! And yes, it can be all these things and still delicious!

coco-choco-chia-pudding

If you want to also learn to make Peach (or Pineapple!) Cheesecake and the Peanut Pecan Dream, we invite you to join us at the October 13, 2017 workshop (or see Upcoming Events to find the next workshop!) where you get to make three gluten-free, healthy, and delicious desserts – that can also fit in as a great afternoon snack – and take four meal-prepped treats home with you.  You will get the recipes and learn about what makes these treats a healthier option and what’s really going on with sugar and your health.

Yes, I said healthy AND delicious. I mean, where else can you get 10 grams of fiber, 20% of the Daily Value (%DV) for Vitamin D, and 50% of the DV for calcium in a dessert!?? This is one treat you can feel good about giving your little ones (or enjoying for yourself!) because this sugar comes with some solid nutrition as well!

Without further ado – here is the recipe! Click for printer-friendly PDF!

Coco-Choco-Chia Pudding

A Mason Jar Meal-Prep Workshop Recipe by Alexia Lewis RD / N.E.W. Motivation Coaching

Makes 1 serving

INGREDIENTS & SUPPLIES

 1                        Mason Jar, 1-cup size

3/4 cup           Almond milk, dark chocolate

2 Tbsp             Chia seeds

1 packet          Alternative sweetener

1 Tbsp             Coconut, shredded, no sugar added

1 pinch            Salt

2 Tbsp             Coconut whipped topping

DIRECTIONS

1.      Measure all ingredients except coconut whipped topping into blender

2.     Blend for 30 seconds

3.     Pour mixture into mason jar

4.     Top with whipped topping

5.     Close jar tightly and store in refrigerator until ready to eat (up to 3-5 days)

NUTRITION PER SERVING

250 calories, 14 g fat (5 g saturated fat, 0 trans fat), 0 mg cholesterol, 275 mg sodium, 30 g carbohydrates, 10 g fiber, 15 g sugar, 5 g protein plus 50% DV calcium and 20% DV Vitamin D

NOTES

This will have a slightly “gritty” texture due to grinding the chia seeds, you can skip grinding (and skip alternative sweetener) but you should refrigerate 2 days before serving or pudding will be much more liquid. 

Reduce added sugar/carbohydrates by using unsweetened almond milk plus 1 scoop chocolate protein powder.


Meal Plan Yumminess

It’s been a while since I posted a meal plan and I’m back with a delicious week of meals to share with you. I’ve been faithfully planning and prepping and have started to get a little bored with the same old meals. This week, I added a few new recipes.

Do as much prep as you can over the weekend. I chop omelet veggies, make overnight oats, boil eggs (last 5 days if they don’t crack!), make mason jar salads, and do whatever else I can to prepare ahead of time. Notice this week is heavier in cooking the first few days but then relies on leftovers to get through the week.

Not listed is a Chocolate Chia Pudding dessert I’ll be making when I sign off from here because chocolate. Yum.

Sunday: 

B – Egg white omelet made with egg whites, shredded cheddar/jack, onions, mushrooms, and spinach served with a piece of toast with olive oil butter. TIP: Do your breakfast prep for the week by chopping onions and mushrooms that have been cleaned with a paper towel (no water!) and storing in mason jars – you still have to cook; but the chopping is the time-consuming part so this saves time in the morning!

L – White Bean Caprese Salad (added chopped raw videlia onions) served on spinach/romaine lettuce.

D – Baked tofu (press, cube, toss with Italian salad dressing and bake) mixed with zucchini carpaccio (pictured with this blog). Note to self: invest in a mandolin.

S – Boiled egg; cucumbers and Zesty Carrot Hummus – you seriously must try this! DELISH!

Monday:

B – omelet with toast

L – Loaded Sweet Potato

D – Strawberry Cucumber Salad (with balsamic glaze – yes please!) and (Chicken) Sausage Stuffed Zucchini Boats. 

S – Apple with Laughing Cow Cheese

Tuesday:

B – Overnight Oats (were prepped over weekend so easy breezy breakfast) with a sliced banana.

L – Leftover White Bean Caprese Salad on lettuce/spinach

D – Leftover Sausage Boats and Strawberry Cucumber Salad

S – Kefir and blackberries

Wednesday:

B – Overnight Oats with banana

L – Leftover Loaded Sweet Potato

D – Baked fish, steamer vegetables, quinoa

S – Egg salad (egg, mayo) with carrots

Thursday:

B – Overnight Oats with banana

L – Mason Jar Salad (prepped over weekend) with a boiled egg and blue cheese crumbles

D – Fish Bowls (leftover fish, quinoa, chipotle, jalapeno, veggies, sour cream – whatever is on hand and needs to be eaten but with a Mexican twist).

S – Apple with carrot hummus

Friday:

B – Omelet with toast

L – Leftover Loaded Sweet Potato

D – Turkey burgers (tomato, lettuce, red onion, avocado, cheese) and fries (yes – the splurge meal happens for me too!)

S – Kefir and blackberries

Saturday: 

B – Overnight Oats

L – Mason Jar Salad with tuna packet (buffalo tuna is so yum).

D – Turkey Burger Bowls (chopped burger, lettuce, tomato, pickles, blue cheese and the rest of the chopped food that needs to be eaten!

S – Carrots with carrot hummus

Thanks for the inspiration as always to Clean Eating Magazine (just the recipes please people, not the articles! Food is NOT “clean” or “dirty” unless of course, it needs to be washed), SkinnyTaste (easy, low calorie, and crazy good recipes) and this week to my new find, Minimalist Baker.

Let me know if you try any recipes this week and if you like the Meal Plan posts!

Overnight Oats

“Getting what you want is simple, but not easy.” – Mel Robbins.

I believe this is true when applied to nutrition. I think many of us know WHAT to do – nutrition is really simple once you get away from the hype of the media and uneducated bloggers. We just struggle with ACTUALLY DOING IT – it isn’t easy!

To further my mission of “heart healthy nutrition made easy,” I bring you a way to fit a healthy breakfast into your meal planning. I love the ease of the week when I take the time to do meal preparation on the weekends. In fact, my husband and I have only eaten out about 8 times since the year began five months ago. That was not our goal; but is a happy unanticipated consequence of having a plan in place.

One of the best perks of meal prep is having a hot breakfast for very little work. I’ve been accomplishing this with overnight oats and with pre-chopped vegetables for omelets or “scrambles” if I’m in a hurry. Mason jars are AMAZING for keeping my chopped onion and mushrooms (cleaned with a paper towel, not water) fresh through the week!

However, in my work with my patients lately, I have been hard pressed to find an overnight oats recipe online that works for all of my patients – especially those working on blood sugar control. Once you add oats, dairy, and fruit together, you’ve got a small jar carbohydrate delight that is just an overload for the morning meal.

Note – carbohydrates are NOT bad. Carbohydrates are AWESOME! However, many people tend to eat tooooo many of them. So, please DO NOT ban or severely limit carbohydrates; but many of us could do with reigning in our portion sizes a bit.

Without further ado – my basic overnight oats recipe is below. This serving provides 215 calories and 30 grams of carbohydrates per jar. Feel free to add more fruit and nuts and other assorted yumminess to fit your needs and preferences.

Oh and by the way, Mel Robbins 20 minute video is so worth the time!

Click the recipe title for a printer-friendly version!

Simple-Overnight-Oats

Serves one

Ingredients

1/3 cup of old-fashioned or quick cooking plain oats

2/3 cup of unsweetened almond milk

1 tablespoon of chia seeds

1 Tablespoon peanut butter powder (no sugar added)

1 teaspoon of ground cinnamon

1 teaspoon cocoa powder

1 teaspoon vanilla extract

Directions

  1.  Put all ingredients into a Mason jar or other container and stir to combine.
  2. Store in refrigerator at least overnight (can be made up to 5 days in advance and stored in fridge!)

To serve: This can be eaten cold or hot (microwave 1-2 minutes but do NOT microwave in a plastic container).

Nutrition per serving (entire recipe): 215 calories, 8 grams fat, 7 grams unsaturated fats, 1 gram saturated fat, 0 grams trans fat, 0 milligrams cholesterol, 165 milligrams sodium, 30 grams carbohydrates, 10 grams fiber, 8 grams protein.

NOTES:

The chia seeds act as a thickener (in addition to be a great heart healthy food!) but they are expensive so you can try leaving them out or substituting ground flaxseed.

For those counting carbohydrates to manage blood sugar:  Don’t forget to add your carb grams for any fruit or sweeteners you add!

D-vine Orange Chipotle Cod

“D”-vine Orange Chipotle Cod: A Dish High in Vitamin D

Vitamin D is one of those vitamins that keeps popping up in the media as beneficial for our health and it’s a vitamin that many of us are lacking. I created a recipe high in vitamin D using Atlantic cod, orange juice, bran cereal flakes, and chipotle. The result was a divine vitamin-D rich Orange Chipotle Cod recipe.

904 Fitness Magazine gave me this challenge to go along with a vitamin D article that is in the May edition. As a dietitian, I love turning to food before supplements so I accepted the challenge!

Facts about Vitamin D

  • According to the CDC, 31% of non-Hispanic blacks, 12% of Mexican Americans, and 3% of non-Hispanic whites have vitamin D deficiency.
  • Vitamin D is called the “sunshine vitamin” because substances in our skin are activated by the UV rays to produce vitamin D. This partially explains why vitamin D deficiency is higher in those with darker skin (which protects against UV rays) as well as those who live in climates with less sunshine or who spend more time indoors.
  • The recommended amount of Vitamin D for adults between 19-70 is 600 IU (international units) per day. A deficiency may cause bone issues such as bone pain, muscle pain or spasms, osteomalacia (soft bones), and rickets in children.
  • Since many people supplement, I’ll also give you the tolerable upper limit, which is 4,000 IU per day. Research is ongoing that is looking at the effects of large amounts of Vitamin D so these recommendations may change in the future. A toxicity may cause bone loss and kidney stones – you cannot overload on vitamin D from sunlight.
  • Vitamin D is important for calcium absorption and bone health. It’s being researched for its impact on heart disease, cancer, immune function, type 2 diabetes, blood pressure, and many other things.

I’m a light-skinned white dietitian who lives at the beach in Florida and even I had low enough levels of vitamin D that my physician put me on supplements! So, it is difficult to get your D when you rely on sunshine and foods.

Here’s why it is difficult to get enough vitamin D (600 IU) from foods… unless you are willing to swallow cod liver oil or can afford to eat salmon every day!

Food Amount IU (average) Source
Cod liver oil 1 tablespoon 1,360 Natural
Swordfish 3 ounces 560 Natural
Portabella mushrooms (with UV exposure) 1 cup 450 Natural
Salmon/mackerel (fatty fish) 3 ounces 425 Natural
Tuna (light, canned) 3 ounces 200 Natural
Fortified orange juice 1 cup 115 Fortified
Fortified milk 1 cup 115 Fortified
Fortified yogurt 6 ounces 80 Fortified
Fortified cereal 1 cup 70 Fortified
Sardines (canned in oil, drained) 2 pieces 50 Natural
Egg yolk 1 large 30 Natural
Portabella mushrooms (no UV exposure) 1 cup 10 Natural

Note that the fortified foods give an average for the IU of vitamin D and the actual amount can vary quite widely based on the level of fortification. When I was looking for cereals for my recipe, I found cereals with 0% to 25% of the daily value of vitamin D! It’s important to look at the labels for the fortified foods you choose. Also, notice that mushrooms contain much more vitamin D if they have been exposed to UV light. Since the packaged mushrooms in my store didn’t mention UV light on their labels, I asked my grocer about the mushrooms in the store and he had no idea if they were UV-exposed.

I turned to fish and fortified foods to make a “D”-vine Orange Chipotle Cod dish that has 32% of the daily value (~ 200 IU) of vitamin D and packs a nice little spicy kick. This recipe is also heart-healthy with low calories, low saturated fat, no trans fat, and low sodium. It is a little higher in cholesterol than I’d like; but still within heart healthy recommendations.

D-vine Orange Chipotle Cod (click link for a printer-friendly version)

Makes: 4 servings

Ingredients

Orange Chipotle Sauce

  • Chipotle in Adobo: 1 chipotle pepper, de-seeded and chopped plus 1 Tablespoon sauce
  • 1 cup vitamin D fortified orange juice
  • 1/4 cup vitamin D fortified plain non-fat yogurt

Fish

  • 2 large eggs
  • 2 cups vitamin D rich (25% DV) bran flakes cereal
  • 4 6-ounce Atlantic Cod filets
  • Non-stick cooking spray

Directions

Preheat oven to 450° F. Line baking sheet with tin foil and spray with non-stick cooking spray and set aside.

When preparing chipotle peppers, or any hot pepper for that matter, remember that the heat is mostly in the seeds. Chipotles pack a spicy punch so remove these little seeds before chopping to reduce the kick in the sauce.

Deseeding Chipotle Peppers

Begin sauce. Pour 1 cup orange juice, chipotle pepper, and chipotle sauce into small saucepan and heat until mixture just begins to boil. Reduce heat to low and simmer, stirring frequently to prevent sticking until mixture thickens, approximately 35 minutes. Set aside when done.

The thicker drops show that the sauce has begun to thicken - it will continue to thicken after removed from the heat.
The thicker drops show that the sauce has begun to thicken – it will continue to thicken after removed from the heat.

In a shallow bowl, crack eggs and stir to combine yolk and white. Pour bran cereal into another shallow bowl and use measuring cup or the back of a spoon to crush the cereal into small pieces.

Use the back of your measuring cup as a crushing tool for the cereal
The smaller the flakes, the better the coating!

Rinse fish filets, draw through the egg and then press gently into the cereal to coat the fish with cereal. Place fish on foil-lined baking sheet. Repeat with each filet. Sprinkle any remaining cereal on top of fish.

Having everything prepared and close together makes coating the fish much easier

Bake fish in oven for 20 minutes or until done and flesh flakes easily with a fork.

When orange-chipotle sauce has cooled, combine the sauce with the yogurt and stir to combine.

To serve, top each fish filet with approximately 1/4 cup of sauce.

Nutrition Information per serving (1 fish filet topped with 1/4 cup sauce): 315 calories, 5 grams fat (1 gram saturated fat, 0 trans fat), 174 milligrams cholesterol, 375 milligrams sodium, 26 grams carbohydrate (3 grams fiber), 37 grams protein, and 32% DV of vitamin D.

Served with brown rice mixed with chopped mushrooms and spinach – enjoy!

D-vine Orange Chipotle Cod

References as linked above, Nutrition: Concepts and Controversies, and the Linus Pauling Institute.

Delicious, Easy, and Healthy Vegan CrockPot Quinoa Chili

Eat More Beans! Crockpot Quinoa Chili Recipe (Vegan)

Imagine this. You are in the grocery store and you need to buy some beans. In one hand, you hold a can of beans. In the other hand, you hold a bag of dried beans. Which one do you buy?

You probably consider a few things before you decide.

The first consideration may be convenience. The canned beans are ready to go. You can throw those in the microwave and have hot, cooked beans in just a couple of minutes. The dried beans will take much more time because you have to soak them for many hours and then cook them for another couple of hours. Do you have time for this? Do you know how to cook dried beans? Will you forget and then have to come up with a Plan B dinner?

The second consideration may be nutrition. Beans are a nutrition-packed food! If you cook dried beans, then in 1/2 cup of black beans you get 7 grams of protein, 20 grams of carbohydrates, 14 grams of fiber, and 10% daily value of iron with only 115 calories, 1/2 gram of fat, and no cholesterol or sodium! If you choose the canned beans, much of this stays the same; but you get more sodium. If you choose regular black beans, that 1/2 cup can have 500 milligrams of sodium and reduced sodium black beans can have 240 milligrams of sodium. Some canned products are also packaged in cans that have BPA.

Many people don’t consider cost because those other two things are more important. A 15 ounce can of beans gives you approximately 1 3/4 cups of beans for $1.00 to $3.00. A 16 ounce bag of dried beans contains 3 1/4 cups of dried beans which gives you about 9 cups of cooked beans for about  $1.00 to $2.00. If you do the work of cooking dried beans, you get about five times a much for your money!

I used dried beans most of the time and save canned beans for when I don’t want to rely on myself to remember to cook dried beans the day before I need them or I decided on having beans for dinner on the day I grocery shop. I went in search of dried bean recipes that eliminated the need to cook the beans the day before. After reviewing a few recipes for cooking times and methods and a few trial runs, here is what I ended up with.

Crockpot Quinoa Chili

Makes 9 cups cooked chili

Prep time: 15 minutes, Cook time: 6 hours 15 minutes

Skill level: low

Ingredients

1 1/2 cups dried pinto beans

1/2 cup uncooked quinoa, rinsed

1 teaspoon or 2 cloves minced garlic

2 cups frozen corn

1 package (10 ounces) spinach

2 cups low-sodium salsa

1/2 large red onion, chopped

5 cups water

1/2 teaspoon each: Hot Shot (red/black pepper blend) and red pepper flakes

1/4 teaspoon of each ground spice: turmeric, paprika, cayenne pepper, cumin, and chipotle chile pepper

Quinoa Chili Ingredients
Ingredients – Yes, those are pinto beans from Hatch, New Mexico courtesy of a great neighbor!

Directions

1. Layer all ingredients except spices in crockpot in order listed above.

2. Cook on high heat for one hour and then reduce to low heat for five hours. If home, stir occasionally making sure beans and quinoa stay covered by liquid.

3. Add spices and stir before serving.

Quinoa Chili Start
How it starts…

Nutrition Information per 1-cup serving: 138 calories, 1 gram fat (0 saturated, 0 trans), 0 milligrams cholesterol,  225 milligrams sodium, 34 grams carbohydrate, 13 grams fiber, 8 grams protein.

Serving suggestion: Stir in plain Greek yogurt (not vegan!) to cool it down or top with chopped chipotle peppers and hot sauce to kick it up a notch! I added homemade cornbread muffins on the side (also not vegan) following this recipe and sliced tomatoes.

Delicious, Easy, and Healthy Vegan CrockPot Quinoa Chili


Dinner is served!

Weekly Meal Plan: Baked Panko Shrimp and Pineapple Fried Rice

One thing you didn’t know about me until now is that my second job was in a Japanese Steak House where I worked as a hostess. I was young and what I remember most about that job is how difficult it is to dress in a kimono. Below is an old polaroid and the only picture I have from that time… long ago…

Alexia in Kimono 1986

The other things I came away from that job with were a love of sushi and the knowledge that cooked rice should be refrigerated before it is turned into fried rice. With this knowledge, I scoffed at the feedback on the Pineapple Fried Rice recipe, knowing that my fried rice would not be mushy since I knew this trick!

I didn’t measure for this recipe and I used mushrooms instead of the red pepper. The sauce (pineapple, soy sauce, red pepper flakes) is absolutely delicious and I will use this for other recipes. The rice was also really tasty; but unfortunately, it was mushy!

Pineapple Fried Rice

I figured next time, I would also rinse off the rice before putting it in the fridge to wash some of the sticky starch off the rice… however, next time (yes, I already made it again and added diced chicken and broccoli), I used steamed white rice picked up from the local Chinese restaurant. I find that a worthwhile expense because it made a much less sticky rice dish.

For the Baked Panko Shrimp, I simply combined panko and cayenne pepper, then dipped raw shrimp into egg whites and then the panko mixture. I laid them out on a baking sheet covered with tin foil. I suggest spraying this with cooking spray, a step I did not do and I lost half the panko breading on the foil! These were baked at 475 for about 20 minutes.

Baked Panko Shrimp
Baked Panko Shrimp

I served these with sauteed spinach and mushrooms with sliced almonds. YUM!

Dinner is served!
Dinner is served!

Yummy Southern Shrimp Scampi

Southern Shrimp Scampi

Yes, shrimp scampi can be heart healthy! With a few adjustments, this dish becomes low in saturated fat, cholesterol, and sodium and yet is still chock full of flavor.

I believe a traditional scampi would include lemon and butter; but I used what I had on hand from the wonderful UNF Ogier Gardens. I ended up with a scampi that has okra and kale. Since these are traditional southern ingredients, I named this southern scampi.

This recipe is one the came together as I cooked it and so the ingredients are estimations. I did not measure ahead of time and I ended up with 3 servings (an odd number for a recipe, I  know!) and leftover spaghetti. If you want more or less of an ingredient or don’t think the consistency is right (too watery or too dry), please make adjustments to the amounts listed.

Yummy Southern Shrimp Scampi

Southern Shrimp Scampi

(Makes 3 servings)

Ingredients

  •  1/2 package of spaghetti (I used Dreamfields but recommend whole wheat)
  • 1 Tablespoon olive oil
  • 1 1/2 Tablespoons minced garlic
  • 6 okra pods, chopped into 1-inch pieces
  • 1 cup low-sodium vegetable broth, divided
  • 1/2 cup white wine, divided
  • 3 large Dino (lacinato) kale leaves, stems removed, cut into 1-inch square pieces
  • 3 button mushrooms, sliced
  • 15 medium raw shrimp, peeled, deveined, each one cut into 3 pieces
  • Garlic powder, to taste
  • Italian seasoning, to taste
  • Pecorino-Romano cheese, grated, to taste

Directions:

  1. Begin spaghetti by boiling water. Add spaghetti and cook to desired tenderness. Drain and set aside until sauce is prepared.
  2. While pasta water is coming to a boil, begin sauce by heating oil in saucepan. When heated, add garlic and sauté 1 minute – do not let it brown.
  3. Add okra and cook, stirring frequently for about 2 minutes. Add half of vegetable broth and white wine and simmer, stirring frequently until okra begins to soften, about 5 minutes.
  4. Add kale and mushrooms and cook until kale begins to wilt.
  5. Add shrimp and the remaining vegetable broth and white wine. Simmer and stir frequently until shrimp is pink and cooked through.
  6. Sprinkle liberally with garlic powder, Italian seasoning and stir to combine.

To serve: top 3/4 cup of spaghetti with 1/3 of southern shrimp scampi sauce, sprinkle with a small amount of  pecorino-romano cheese. Serve hot.

Per Serving: 310 calories, 7 grams fat, 2 grams saturated fat, 0 grams trans fat, 4 milligrams cholesterol, 290 milligrams sodium, 38 grams carbohydrates, 3 grams fiber, 14 grams protein

Let me know what you think. I’d love to hear about any adjustments you make!