Category Archives: Food

D-vine Orange Chipotle Cod

“D”-vine Orange Chipotle Cod: A Dish High in Vitamin D

Vitamin D is one of those vitamins that keeps popping up in the media as beneficial for our health and it’s a vitamin that many of us are lacking. I created a recipe high in vitamin D using Atlantic cod, orange juice, bran cereal flakes, and chipotle. The result was a divine vitamin-D rich Orange Chipotle Cod recipe.

904 Fitness Magazine gave me this challenge to go along with a vitamin D article that is in the May edition. As a dietitian, I love turning to food before supplements so I accepted the challenge!

Facts about Vitamin D

  • According to the CDC, 31% of non-Hispanic blacks, 12% of Mexican Americans, and 3% of non-Hispanic whites have vitamin D deficiency.
  • Vitamin D is called the “sunshine vitamin” because substances in our skin are activated by the UV rays to produce vitamin D. This partially explains why vitamin D deficiency is higher in those with darker skin (which protects against UV rays) as well as those who live in climates with less sunshine or who spend more time indoors.
  • The recommended amount of Vitamin D for adults between 19-70 is 600 IU (international units) per day. A deficiency may cause bone issues such as bone pain, muscle pain or spasms, osteomalacia (soft bones), and rickets in children.
  • Since many people supplement, I’ll also give you the tolerable upper limit, which is 4,000 IU per day. Research is ongoing that is looking at the effects of large amounts of Vitamin D so these recommendations may change in the future. A toxicity may cause bone loss and kidney stones – you cannot overload on vitamin D from sunlight.
  • Vitamin D is important for calcium absorption and bone health. It’s being researched for its impact on heart disease, cancer, immune function, type 2 diabetes, blood pressure, and many other things.

I’m a light-skinned white dietitian who lives at the beach in Florida and even I had low enough levels of vitamin D that my physician put me on supplements! So, it is difficult to get your D when you rely on sunshine and foods.

Here’s why it is difficult to get enough vitamin D (600 IU) from foods… unless you are willing to swallow cod liver oil or can afford to eat salmon every day!

Food Amount IU (average) Source
Cod liver oil 1 tablespoon 1,360 Natural
Swordfish 3 ounces 560 Natural
Portabella mushrooms (with UV exposure) 1 cup 450 Natural
Salmon/mackerel (fatty fish) 3 ounces 425 Natural
Tuna (light, canned) 3 ounces 200 Natural
Fortified orange juice 1 cup 115 Fortified
Fortified milk 1 cup 115 Fortified
Fortified yogurt 6 ounces 80 Fortified
Fortified cereal 1 cup 70 Fortified
Sardines (canned in oil, drained) 2 pieces 50 Natural
Egg yolk 1 large 30 Natural
Portabella mushrooms (no UV exposure) 1 cup 10 Natural

Note that the fortified foods give an average for the IU of vitamin D and the actual amount can vary quite widely based on the level of fortification. When I was looking for cereals for my recipe, I found cereals with 0% to 25% of the daily value of vitamin D! It’s important to look at the labels for the fortified foods you choose. Also, notice that mushrooms contain much more vitamin D if they have been exposed to UV light. Since the packaged mushrooms in my store didn’t mention UV light on their labels, I asked my grocer about the mushrooms in the store and he had no idea if they were UV-exposed.

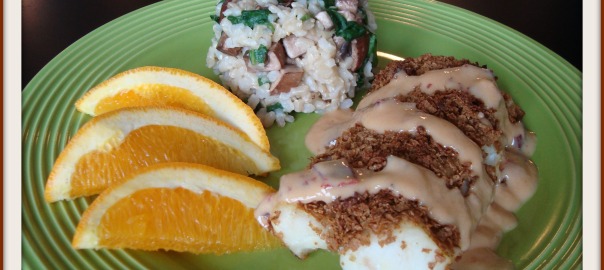
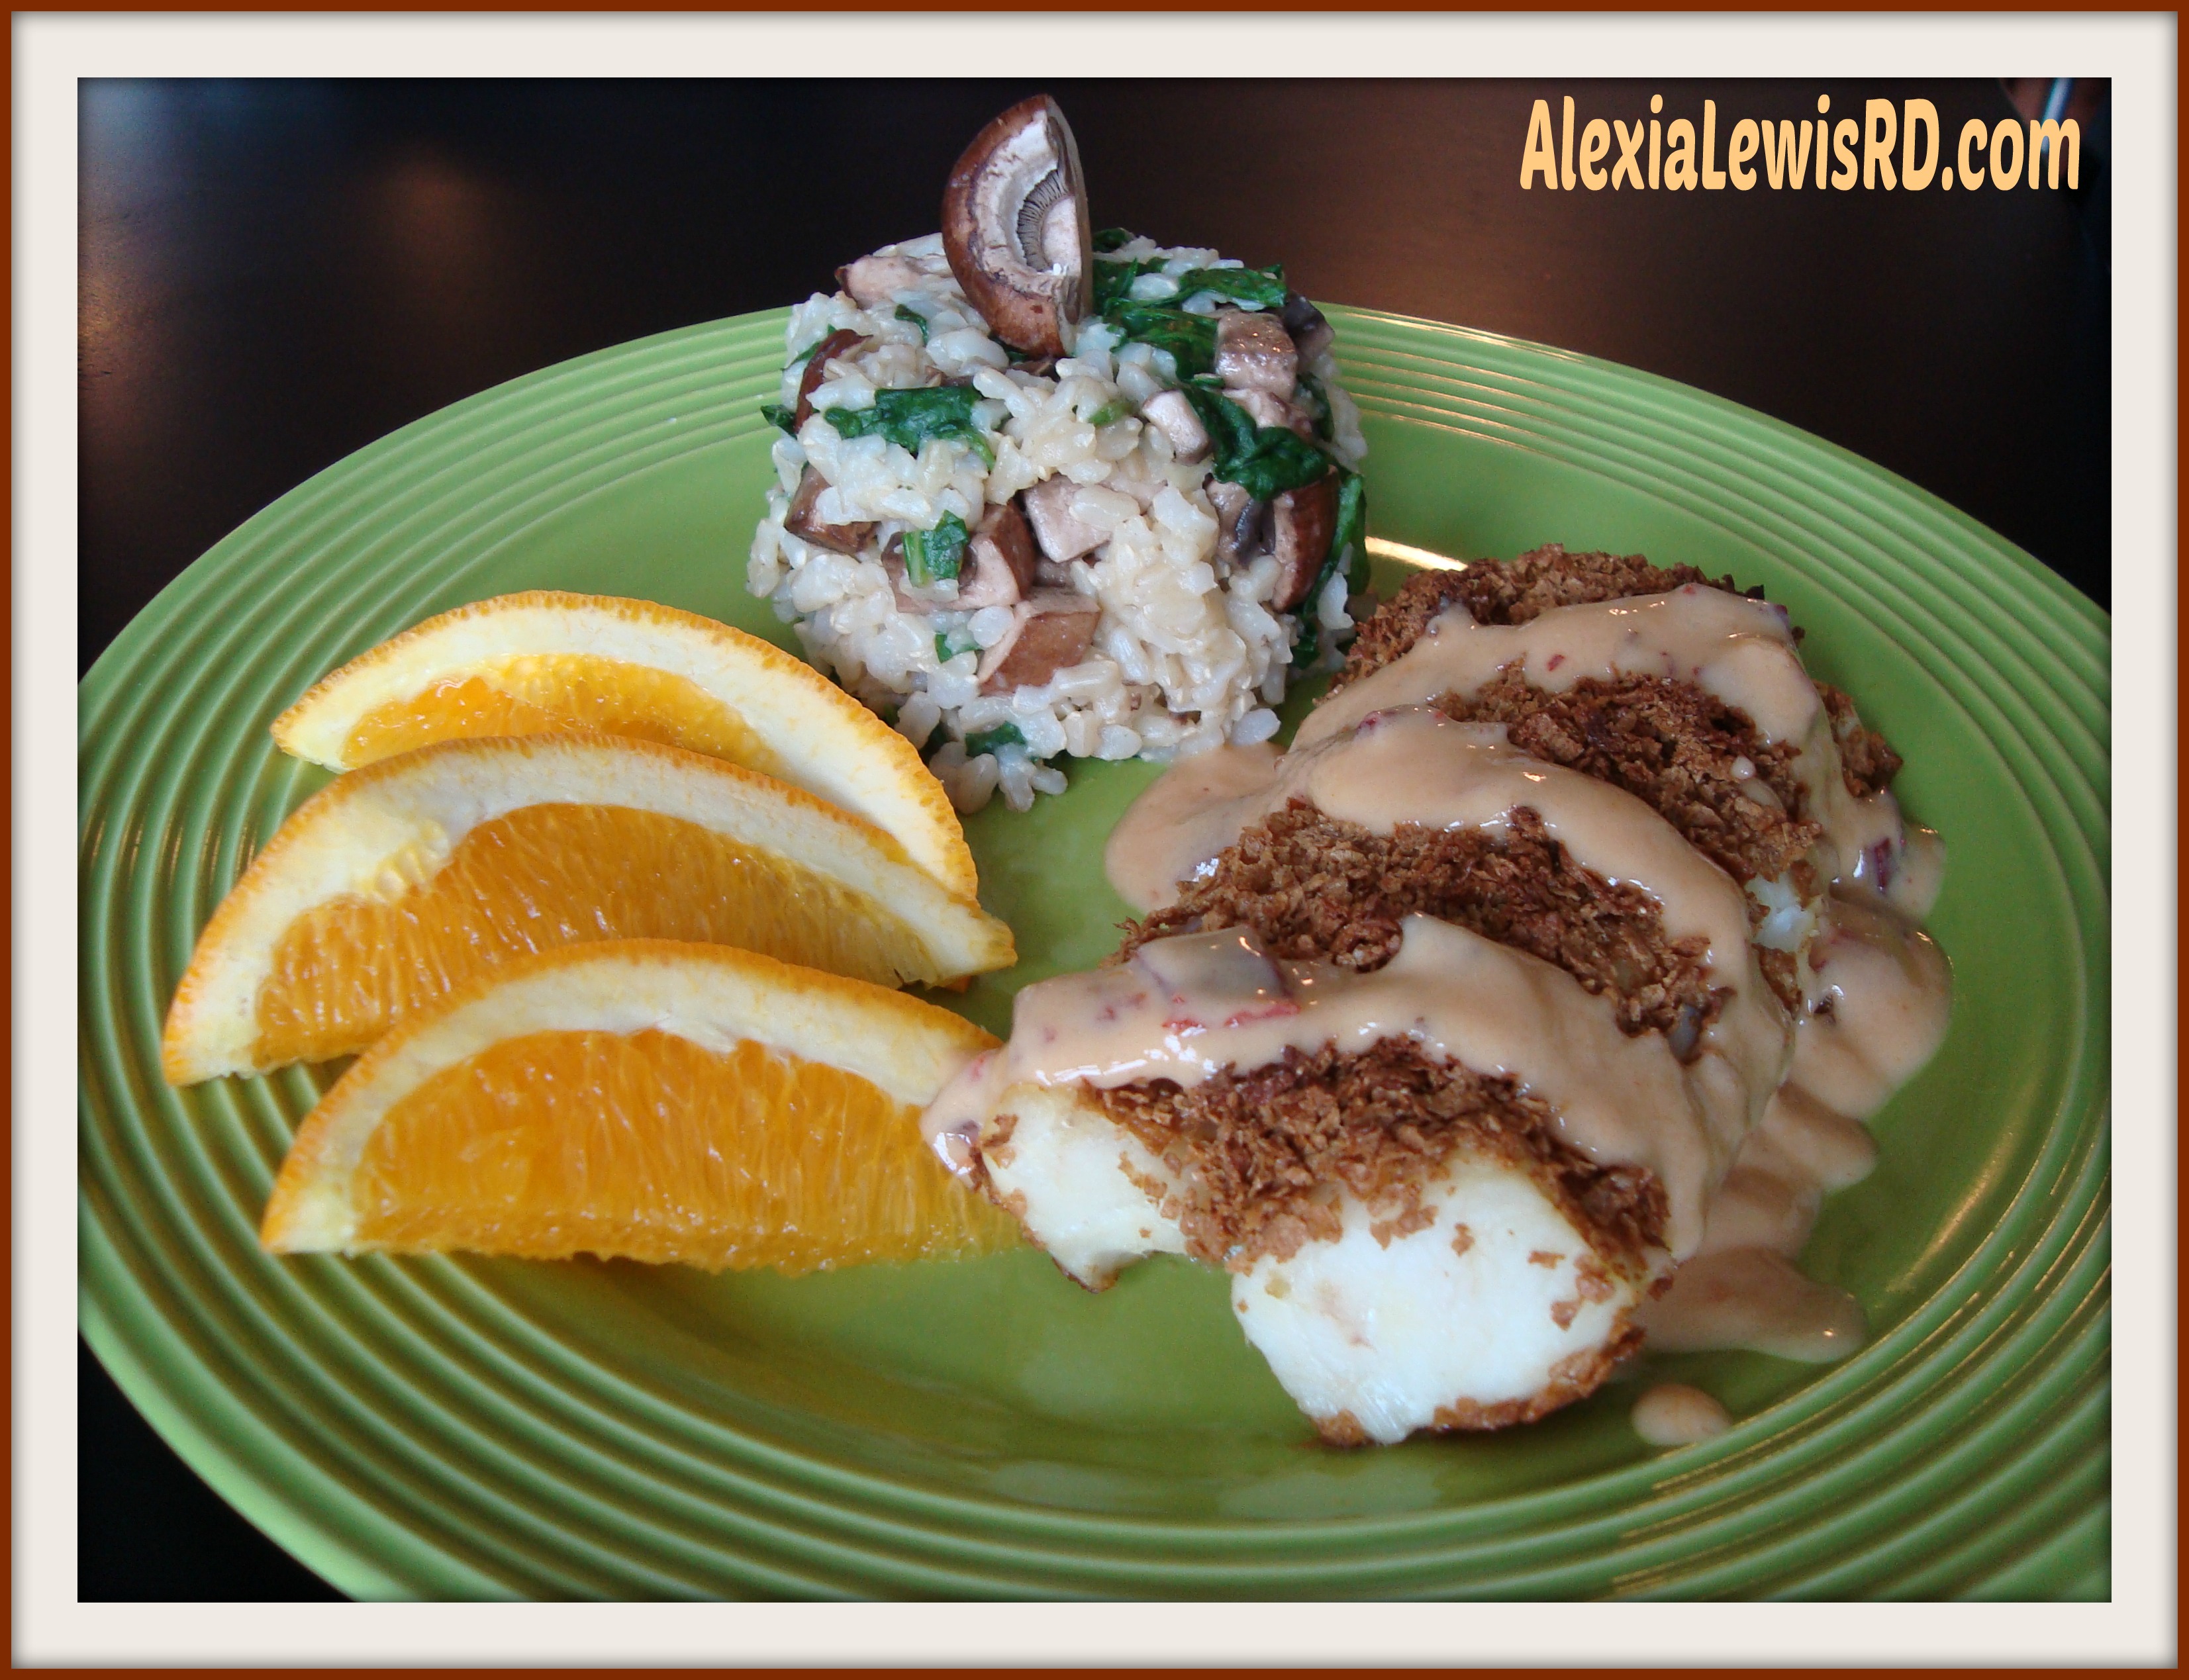
I turned to fish and fortified foods to make a “D”-vine Orange Chipotle Cod dish that has 32% of the daily value (~ 200 IU) of vitamin D and packs a nice little spicy kick. This recipe is also heart-healthy with low calories, low saturated fat, no trans fat, and low sodium. It is a little higher in cholesterol than I’d like; but still within heart healthy recommendations.

D-vine Orange Chipotle Cod (click link for a printer-friendly version)

Makes: 4 servings

Ingredients

Orange Chipotle Sauce

  • Chipotle in Adobo: 1 chipotle pepper, de-seeded and chopped plus 1 Tablespoon sauce
  • 1 cup vitamin D fortified orange juice
  • 1/4 cup vitamin D fortified plain non-fat yogurt

Fish

  • 2 large eggs
  • 2 cups vitamin D rich (25% DV) bran flakes cereal
  • 4 6-ounce Atlantic Cod filets
  • Non-stick cooking spray

Directions

Preheat oven to 450° F. Line baking sheet with tin foil and spray with non-stick cooking spray and set aside.

When preparing chipotle peppers, or any hot pepper for that matter, remember that the heat is mostly in the seeds. Chipotles pack a spicy punch so remove these little seeds before chopping to reduce the kick in the sauce.

Deseeding Chipotle Peppers

Begin sauce. Pour 1 cup orange juice, chipotle pepper, and chipotle sauce into small saucepan and heat until mixture just begins to boil. Reduce heat to low and simmer, stirring frequently to prevent sticking until mixture thickens, approximately 35 minutes. Set aside when done.

The thicker drops show that the sauce has begun to thicken - it will continue to thicken after removed from the heat.
The thicker drops show that the sauce has begun to thicken – it will continue to thicken after removed from the heat.

In a shallow bowl, crack eggs and stir to combine yolk and white. Pour bran cereal into another shallow bowl and use measuring cup or the back of a spoon to crush the cereal into small pieces.

Use the back of your measuring cup as a crushing tool for the cereal
The smaller the flakes, the better the coating!

Rinse fish filets, draw through the egg and then press gently into the cereal to coat the fish with cereal. Place fish on foil-lined baking sheet. Repeat with each filet. Sprinkle any remaining cereal on top of fish.

Having everything prepared and close together makes coating the fish much easier

Bake fish in oven for 20 minutes or until done and flesh flakes easily with a fork.

When orange-chipotle sauce has cooled, combine the sauce with the yogurt and stir to combine.

To serve, top each fish filet with approximately 1/4 cup of sauce.

Nutrition Information per serving (1 fish filet topped with 1/4 cup sauce): 315 calories, 5 grams fat (1 gram saturated fat, 0 trans fat), 174 milligrams cholesterol, 375 milligrams sodium, 26 grams carbohydrate (3 grams fiber), 37 grams protein, and 32% DV of vitamin D.

Served with brown rice mixed with chopped mushrooms and spinach – enjoy!

D-vine Orange Chipotle Cod

References as linked above, Nutrition: Concepts and Controversies, and the Linus Pauling Institute.

A Weekly Meal Planner

“ASPIRE” – Six Steps to Healthy Meal Planning

The one best thing you can do to make healthier, nutrition-rich meals, save time and money, and make life easier is to plan your meals ahead of time. You need a strategy to plan healthy meals. If you wait until you are hungry and tired at the end of the day, figuring out what to make for dinner is not easy and you’re more likely to choose something fast, easy, and unhealthy. However, this is one of the things that my clients find the hardest to do.

I’m here to help you “make nutrition easy,” so here is my strategy for you.

Grab some paper, a pen, and ASPIRE to plan your meals. Remembering this acronym will guide you through a simple way to plan meals that are healthy, yummy, and reduce your grocery expenses! I designed my free Weekly Menu Planner just for this! You can use any format as long as you have one column for each day of the week.

A = Agenda

The first thing to do is check your agenda for any commitments, meetings, and changes to your usual schedule. Also check the calendars of the others in your household. This is important so you know which nights you have time to make a meal and which nights you don’t and should plan for leftovers. It also lets you know which nights you need quick and easy meals and which nights you can spend more time on your meal creations. You can also note the days that you have to be out of the house early and may benefit from packing your a lunch the night before. Write down everyone’s commitments that have an impact on meals on the weekly menu planner.

S = Stock

What do you already have on stock, on par, or in your pantry and fridge? Flip your weekly menu planner over and make a list of all the foods in your fridge and pantry (your “stock foods”) on the left side of the back of the paper.

P = Promotions

Check the store promotions. What is on sale this week? What do you have coupons for? We all want to stretch our food dollars and this is one way to do it. If you don’t clip coupons, go to the grocery store’s web site as many are now allowing their customers to electronically collect coupons on reward cards or by their phone number. You can also check one of my favorite coupon sites, Southern Savers, for printable coupons. On the right side of the back of your weekly menu planner, write down the “promotions foods” you plan to buy based on sales, coupons, and promotions.

I = Invent

Put on your creative chef’s hat, and invent meals you can put together using only foods on your list of “stock foods.” If you can’t make anything with what you have in stock, then figure out what you can add from the list of “promotion foods” to make a meal with your  “stock foods”. The idea is to use as few foods from the “promotion foods” list so you make as many meals as you can without spending money on new foods! Once you have invented a few meal ideas, flip your weekly meal planner over and put the meals where they fit best based on your schedule.

A Weekly Meal Planner

Tips

  • Google is your friend. I made this delicious Puff Pastry Tart just by putting “puff pastry,” “spinach,” “sweet potato,” and “healthy easy recipe” into Google!
  • Cook more than you need so you have leftovers from every time you cook! A few tweaks and one night’s baked chicken, sauteed mushrooms and zucchini, and brown rice transform into the second night’s chicken quesadillas.
  • Make the first meal on your weekly planner one that you have all the ingredients for… just in case you don’t make it to the store right away.
  • This is the hard part and it takes time – so save every weekly meal planner you create to re-use for those weeks you don’t want to spend the time and effort doing all this work.
  • Use the food group tallies on the bottom of my weekly meal planner to make sure you are including food from all food groups in your meal plans. Don’t know how many of each food group to include? Here’s a guideline based on a 2,000 calorie diet.

R = Run

Get out and run those errands! Use your list of “promotions foods” to make a shopping list. Clip your coupons. Go to the grocery store and do your shopping.

E = Execute

You spent all that time and effort making a plan, now execute your plan.

Post the weekly meal planner in the kitchen where you can see it. If you have helpers at home, let them know they can start prepping foods for dinners before you get home.

Most importantly, be flexible. This plan is an outline and life happens. You may have forgotten you need fish for one dinner… just push that meal back to another day. You may decide that you are way too tired to cook one night… just pick up your plan the next night.

Always have a Plan B Meal in mind. In my home, it is either flatbread pizza or turkey burgers and sweet potato fries. We always have the ingredients in stock  and, on those nights we aren’t feeling our meal plan, we have a yummy 20-minute, low-effort dinner.

Let me know if you like my strategy. I hope you ASPIRE to give meal planning a try this week!

Delicious, Easy, and Healthy Vegan CrockPot Quinoa Chili

Eat More Beans! Crockpot Quinoa Chili Recipe (Vegan)

Imagine this. You are in the grocery store and you need to buy some beans. In one hand, you hold a can of beans. In the other hand, you hold a bag of dried beans. Which one do you buy?

You probably consider a few things before you decide.

The first consideration may be convenience. The canned beans are ready to go. You can throw those in the microwave and have hot, cooked beans in just a couple of minutes. The dried beans will take much more time because you have to soak them for many hours and then cook them for another couple of hours. Do you have time for this? Do you know how to cook dried beans? Will you forget and then have to come up with a Plan B dinner?

The second consideration may be nutrition. Beans are a nutrition-packed food! If you cook dried beans, then in 1/2 cup of black beans you get 7 grams of protein, 20 grams of carbohydrates, 14 grams of fiber, and 10% daily value of iron with only 115 calories, 1/2 gram of fat, and no cholesterol or sodium! If you choose the canned beans, much of this stays the same; but you get more sodium. If you choose regular black beans, that 1/2 cup can have 500 milligrams of sodium and reduced sodium black beans can have 240 milligrams of sodium. Some canned products are also packaged in cans that have BPA.

Many people don’t consider cost because those other two things are more important. A 15 ounce can of beans gives you approximately 1 3/4 cups of beans for $1.00 to $3.00. A 16 ounce bag of dried beans contains 3 1/4 cups of dried beans which gives you about 9 cups of cooked beans for about  $1.00 to $2.00. If you do the work of cooking dried beans, you get about five times a much for your money!

I used dried beans most of the time and save canned beans for when I don’t want to rely on myself to remember to cook dried beans the day before I need them or I decided on having beans for dinner on the day I grocery shop. I went in search of dried bean recipes that eliminated the need to cook the beans the day before. After reviewing a few recipes for cooking times and methods and a few trial runs, here is what I ended up with.

Crockpot Quinoa Chili

Makes 9 cups cooked chili

Prep time: 15 minutes, Cook time: 6 hours 15 minutes

Skill level: low

Ingredients

1 1/2 cups dried pinto beans

1/2 cup uncooked quinoa, rinsed

1 teaspoon or 2 cloves minced garlic

2 cups frozen corn

1 package (10 ounces) spinach

2 cups low-sodium salsa

1/2 large red onion, chopped

5 cups water

1/2 teaspoon each: Hot Shot (red/black pepper blend) and red pepper flakes

1/4 teaspoon of each ground spice: turmeric, paprika, cayenne pepper, cumin, and chipotle chile pepper

Quinoa Chili Ingredients
Ingredients – Yes, those are pinto beans from Hatch, New Mexico courtesy of a great neighbor!

Directions

1. Layer all ingredients except spices in crockpot in order listed above.

2. Cook on high heat for one hour and then reduce to low heat for five hours. If home, stir occasionally making sure beans and quinoa stay covered by liquid.

3. Add spices and stir before serving.

Quinoa Chili Start
How it starts…

Nutrition Information per 1-cup serving: 138 calories, 1 gram fat (0 saturated, 0 trans), 0 milligrams cholesterol,  225 milligrams sodium, 34 grams carbohydrate, 13 grams fiber, 8 grams protein.

Serving suggestion: Stir in plain Greek yogurt (not vegan!) to cool it down or top with chopped chipotle peppers and hot sauce to kick it up a notch! I added homemade cornbread muffins on the side (also not vegan) following this recipe and sliced tomatoes.

Delicious, Easy, and Healthy Vegan CrockPot Quinoa Chili


Dinner is served!

Weekly Meal Plan: Baked Panko Shrimp and Pineapple Fried Rice

One thing you didn’t know about me until now is that my second job was in a Japanese Steak House where I worked as a hostess. I was young and what I remember most about that job is how difficult it is to dress in a kimono. Below is an old polaroid and the only picture I have from that time… long ago…

Alexia in Kimono 1986

The other things I came away from that job with were a love of sushi and the knowledge that cooked rice should be refrigerated before it is turned into fried rice. With this knowledge, I scoffed at the feedback on the Pineapple Fried Rice recipe, knowing that my fried rice would not be mushy since I knew this trick!

I didn’t measure for this recipe and I used mushrooms instead of the red pepper. The sauce (pineapple, soy sauce, red pepper flakes) is absolutely delicious and I will use this for other recipes. The rice was also really tasty; but unfortunately, it was mushy!

Pineapple Fried Rice

I figured next time, I would also rinse off the rice before putting it in the fridge to wash some of the sticky starch off the rice… however, next time (yes, I already made it again and added diced chicken and broccoli), I used steamed white rice picked up from the local Chinese restaurant. I find that a worthwhile expense because it made a much less sticky rice dish.

For the Baked Panko Shrimp, I simply combined panko and cayenne pepper, then dipped raw shrimp into egg whites and then the panko mixture. I laid them out on a baking sheet covered with tin foil. I suggest spraying this with cooking spray, a step I did not do and I lost half the panko breading on the foil! These were baked at 475 for about 20 minutes.

Baked Panko Shrimp
Baked Panko Shrimp

I served these with sauteed spinach and mushrooms with sliced almonds. YUM!

Dinner is served!
Dinner is served!

Prepping for the Tart

Weekly Meal Plan: Puff Pastry Tart & Cottage Cheese Enchilada

This is the first in a new recurring post. My plan is to do my personal meal planning for the week and then share the recipes and tips from the week with you. My hope is that you will try something new and be inspired with your own weekly meal planning.

One of my recipes this week was based on the foods I had that needed to be used, specifically a big bag of spinach and thawed puff pastry. I found a recipe for a Sweet Potato, Spinach, and Caramelized Onion Tart with Balsamic Reduction that sounded delicious and I had every single ingredient on hand. I reduced the amount of oil from 3 Tbsp to 1/2 Tbsp only used when caramelizing the onions; but that can even be swapped out for starting the onions with cooking spray. If you are trying to improve your cholesterol numbers, use the olive oil and if you are trying to reduce calories, use the cooking spray. I also replaced the honey with agave syrup (what I had) and used about 1/2 Tbsp for the balsamic reduction, which thickened up beautifully!

Prepping for the Tart

I found this to be scrumptious… but… the toppings were too thick. If you make this, I’d recommend using half the spinach and onions (or make two tarts). I piled it up anyway and I think this contributed to the pastry being a bit doughy in the middle (or it could have been that I should have cooked it a little bit longer). I also recommend you serve this on a day that you’ve had enough protein (meat, dairy foods, eggs, beans, nuts, etc.) since it is low in protein. I served this with grape tomatoes that I halved and roasted with mozzarella cheese on top. One tart serves 2-4 people depending on their appetites and what else you serve it with.

Tart Ready for the Oven

My other new recipe this week was enchiladas. I’ve been playing with using cottage cheese in cooking. While I love cottage cheese on its own; I’m kind of enthralled with cooking with it right now. Last week, I made lasagna rolls and they were delicious. I’ll be tweaking that recipe and posting it here in the future. I found myself with 1-cup of cottage cheese and I found a Cottage Cheese Enchiladas recipe. I’m not a huge fan of corn tortillas so I had to purchase those and I need your advice on these (see below).

Of course, I modified this recipe as well. We were out of cheddar cheese so I used shredded mozzarella as the only cheese, I omitted the chives and lime wedge, and I made the enchilada sauce. The sauce was simple, I used diced tomatoes (what I had) and pureed those in the food processor, then added chipotle powder, cumin, garlic powder, red pepper flakes, cayenne pepper and a touch of Splenda. Perfection! To the filling, I added some boiled chicken I had since my dog is currently not feeling well and is on a chicken and rice diet. Omit the chicken to keep this vegetarian.

Enchilada Filling
Enchilada Filling

These were INCREDIBLE in terms of flavor; but they completely fell apart. So, readers, if you know how to handle corn tortillas so they don’t fall apart, please comment on this post – I need your help since I will be making this dish again. I served this with chips and salsa and a side salad of halved grape tomatoes, diced avocado, and lime juice. As you can see, it makes a hefty portion!

A Whole Lotta Enchilada

I do apologize for the quality of the photographs. My wonderful husband got me a Galaxy Tablet for the holiday and I am still learning how to best use the camera… and to be honest, hunger was a factor in not having the patience to get that perfect picture!

Yummy Southern Shrimp Scampi

Southern Shrimp Scampi

Yes, shrimp scampi can be heart healthy! With a few adjustments, this dish becomes low in saturated fat, cholesterol, and sodium and yet is still chock full of flavor.

I believe a traditional scampi would include lemon and butter; but I used what I had on hand from the wonderful UNF Ogier Gardens. I ended up with a scampi that has okra and kale. Since these are traditional southern ingredients, I named this southern scampi.

This recipe is one the came together as I cooked it and so the ingredients are estimations. I did not measure ahead of time and I ended up with 3 servings (an odd number for a recipe, I  know!) and leftover spaghetti. If you want more or less of an ingredient or don’t think the consistency is right (too watery or too dry), please make adjustments to the amounts listed.

Yummy Southern Shrimp Scampi

Southern Shrimp Scampi

(Makes 3 servings)

Ingredients

  •  1/2 package of spaghetti (I used Dreamfields but recommend whole wheat)
  • 1 Tablespoon olive oil
  • 1 1/2 Tablespoons minced garlic
  • 6 okra pods, chopped into 1-inch pieces
  • 1 cup low-sodium vegetable broth, divided
  • 1/2 cup white wine, divided
  • 3 large Dino (lacinato) kale leaves, stems removed, cut into 1-inch square pieces
  • 3 button mushrooms, sliced
  • 15 medium raw shrimp, peeled, deveined, each one cut into 3 pieces
  • Garlic powder, to taste
  • Italian seasoning, to taste
  • Pecorino-Romano cheese, grated, to taste

Directions:

  1. Begin spaghetti by boiling water. Add spaghetti and cook to desired tenderness. Drain and set aside until sauce is prepared.
  2. While pasta water is coming to a boil, begin sauce by heating oil in saucepan. When heated, add garlic and sauté 1 minute – do not let it brown.
  3. Add okra and cook, stirring frequently for about 2 minutes. Add half of vegetable broth and white wine and simmer, stirring frequently until okra begins to soften, about 5 minutes.
  4. Add kale and mushrooms and cook until kale begins to wilt.
  5. Add shrimp and the remaining vegetable broth and white wine. Simmer and stir frequently until shrimp is pink and cooked through.
  6. Sprinkle liberally with garlic powder, Italian seasoning and stir to combine.

To serve: top 3/4 cup of spaghetti with 1/3 of southern shrimp scampi sauce, sprinkle with a small amount of  pecorino-romano cheese. Serve hot.

Per Serving: 310 calories, 7 grams fat, 2 grams saturated fat, 0 grams trans fat, 4 milligrams cholesterol, 290 milligrams sodium, 38 grams carbohydrates, 3 grams fiber, 14 grams protein

Let me know what you think. I’d love to hear about any adjustments you make!

One Fish, Two Fish, Old Fish, New Fish

Today, I had my standards challenged and this was a good thing.

Fish is on the menu for this week – filets tonight and homemade fish sticks later in the week. I only buy fish or meats at one of the nicer grocery stores, so it was the last thing I needed to pick up to be completely food-ready for the week ahead. I decided to do something different. I decided to check out the little hole-in-the-wall, local-only seafood market.

As a registered dietitian, I consider myself fairly food savvy in terms of how food is grown, raised, processed, and packaged. Fish, however, is one item that always remains fuzzy in my mind. I know to do my part for fish happiness and to reduce disease, wild is preferable to farm raised. I know which fish are more healthful because they are a good source of omega-3 fatty acids, such as salmon or mackerel. I know which fish are better in limited amounts because of potential higher mercury levels, such as swordfish or shark. This, however, is all that my brain chooses to remember. Here’s a great link from the Food and Drug Administration about selecting, storing, preparing fish and some health concerns.

Today, I walked into a local fish market and asked for tilapia. I was happy to learn some more about fish from a friendly fish monger.

This may or may not be my local fishmonger

According to my local fishmonger, tilapia is not a fish that is local to my area (Florida) and since he only carries fish caught up the road in Mayport, he doesn’t have any. He added that most of the tilapia comes from out of the country (which equals a lot of food miles) and is farm raised, not wild caught. He definitely was not a fan of tilapia; but I had a meal plan to stick to so I asked for his recommendation and engaged in an educational conversation about fish.

According to the Monterey Bay Aquarium Seafood Watch 2012 report on tilapia, 95% of the tilapia eaten by Americans is imported from other countries. The fish that is raised in the US is mostly farmed in the West and Northeast regions of the country. Tilapia is the fourth most consumed fish in the USA after shrimp, tuna, and salmon. Most of the US-raised tilapia (75%) is farmed using closed recirculating systems. On the negative side, these fish are separated from other wildlife, ponds are typically overly full, it requires more to be put into the system than comes out (1.4 pounds of feed to produce 1 pound of fish) and many farms use drugs to treat/prevent disease or to change the fish’s gender to male to produce a larger fish. One the positive side, this method does have an overall low environmental cost (food miles excepted).

If you want to know which fish are local for you, check the Monterey Bay Aquarium Seafood Watch site.

If you are curious, I happily purchased a more expensive, local, drug-free triggerfish, which is supposed to be similar to grouper. I will be baking this beautiful fish in the oven at 350 degrees for 15-20 minutes (until it flakes easily with a fork) after dredging the filets in egg whites and coating with a combination of breadcrumbs, crushed pecans, and oregano. On the side, will be homemade tartar sauce (mayonnaise and relish), fresh boiled corn on the cob, and oven-fried red potatoes sprinkled with salt, pepper, and garlic powder.

Is it dinner time yet?

This may or may not be me in the kitchen tonight

Free images from: http://office.microsoft.com/en-us/images/

Mangia!

The Vegan Experiment – Day Four: All Protein Powder is Not Created Equal

I made two breakfasts on Day Four. It is rare that I make something that is inedible. Even my most crazy flavor combinations result in edible, even if unusual, dishes. This was not the case on this day. I had to toss my first breakfast. It was truly that bad. Most protein powders that I’ve used have anywhere from 16-22 grams of protein in a scoop. Since plants do not contain as much protein as the other foods used to make protein powders (whey, soy, etc.), the amount of powder that has to be used to get to 21 grams of protein is huge. It completely overpowered my usually-delicious pumpkin pie oatmeal. I couldn’t eat it. I almost forced myself since I dread throwing away food; but I just couldn’t make myself eat it.

So, here we go – food pictures!

Breakfast #1: Pumpkin Pie Oatmeal – adapted from Clean Eating Magazine. I’m sharing the recipe because if you make this with vanilla whey protein powder, it is very yummy!

First, start your oatmeal on the stove by boiling 2 parts water, adding 1 part whole oats (example: 2/3 cup water and 1/3 cup oats), and then simmering until the desired consitency. While simmering, mix one scoop protein powder with a tiny bit of water and stir into a paste. You can see the plant protein powder took up half the bowl!

Nearly half a bowl-full of plant protein powder to get 21 grams of protein

Next take the same measuring cup you just used for measuring your oatmeal and water, and fill it half with pumpkin puree (no salt) and half with sliced almonds. If you use the same measuring cup, then you can easily adjust this recipe for any amount of oatmeal without having to do any food math!

Pumpkin puree and sliced almonds

Once the oats are cooked, simply add them to the bowl with the protein powder and stir in the pumpkin and almonds. Top this with a dash of cinnamon, nutmeg, and ginger.

Pumpkin Pie Oatmeal
Pumpkin Pie Oatmeal

Breakfast #2:  Kashi Heart to Heart Honey Toasted Oats cereal with almond milk, sliced almonds, and raisins. Coffee with almond milk and splenda. Thank you to Jason McDonald for commenting on my blog post to add nuts to cereal because it made me realize I can add some protein and fun to a basic cereal!

Pumped up cereal
Pumped up cereal

Post-workout Snack: Smoothie made with banana, pineapple, peanut butter, and flaxseed. Blend with as much ice and water as it takes to get the volume and consistency that you like.

Smoothie in progress
Smoothie completed!
Smoothie completed!

Lunch: Hummus wrap (homemade with chickpeas, olive oil, garlic, curry powder, and salt) with lettuce, tomato, and cucumber served with pretzel sticks.

The insides of the hummus wrap

Snack #2: almonds

Dinner: Whole wheat spaghetti with homemade sauce of onions, tomatoes, garlic, silken tofu, marinara sauce, garlic powder, Italian seasoning, red pepper flakes, and fresh basil served with sandwich thin garlic toast (olive oil, garlic powder, and Italian seasoning). For this, I first sauted the onions then added the chopped garlic and chopped tomatoes and let those cook just a little. Then I added the marinara sauce and tofu and cooked to heat through. Last step was seasoning with the spices. It looks a little weird as a sauce due to how the tofu stirred in to the sauce in a chunky way. If I make this again, I’ll blend the sauce as a last step to make it smooth. Regardless of what it looked like, it was good! I think this was extra yummy due to the organic onions and basil from the university’s garden!

Pretty tomatoes, onions, and garlic
Vegan spaghetti
Vegan spaghetti
Mangia!
Mangia!

One victory for today is the realization that my usual urge to (over)-snack on the days that I work from home is greatly diminished following this plan. That’s usually a huge struggle for me and I give in to the temptation to graze all day even thought I’m not hungry. Today, I had that urge for a minute and I was able to overcome it. Overall, I’m feeling good and strong; still gassy but my body is (finally!) adjusting to the extra fiber it’s starting to get a little better! My energy levels are normal for me and I can still think clearly and have strength for
yoga class.

In case you are wondering, I did live the vegan lifestyle for five days in a row. I’m just not the fastest blogger. It’s something I’m working on.

Nutrition information: 1415 calories, 235 grams carbohydrates, 46 grams fiber, 395 grams fat, 2 grams saturated fat, 0 trans fat, 0 cholesterol, 55 grams protein, and 1360 milligrams sodium. For the daily values, my numbers were 54% calcium, 77% iron, 30% vitamin D, 36% zinc, and 250% vitamin B12.

Once again, all images are my personal pictures. You may use them as long as you credit me (my name and a link back to my Web site).

A beautiful vegan salad

Vegan Experiment – Day Three: Taking It to the Office

This was the first day that I was following my vegan diet at work. This added just a little more of a challenge since I had to prepare my lunch and snacks in the morning. I also forgot to photograph my meals while at work, even though I did remember to bring my camera.

Breakfast: Same as previous two days and I’m getting bored with it – Kashi Cinnamon Harvest cereal with almond milk, coffee with almond milk and splenda.

Post-workout Snack: Smoothie with banana, pineapple, and ice/water.

Lunch: Peanut butter and banana sandwich on a sandwich thin.

Snack: Snack: Roasted spicy chickpeas.

Snack: Vegetables from veggie tray (grape tomatoes, baby carrots, snap peas, broccoli).

Dinner: Huge salad with romaine lettuce, broccoli, celery, carrots, mushrooms, snap peas, grape tomatoes, avocado, raisins, roasted chickpeas, sliced almonds, and balsamic vinegar served with triscuits.

A beautiful vegan salad

Overall, I have been feeling fine; but I was a little low on energy on this afternoon. I came home and found myself wishing I didn’t have a meal to prepare for dinner, especially a salad – so much chopping! I also am still ridiculously gassy! I ran this morning and was happy to find that I am still properly fueled to enjoy my morning workouts.

My biggest struggle so far has been my ability to meet what I’ve deemed my nutrient goals for some nutrients.

Nutrition information: 1430 calories, 249 grams carbohydrates, 48 grams fiber, 37 grams fat, 4 grams saturated fat, 0 trans fat, 0 cholesterol, 51 grams protein, and 670 milligrams sodium. For the daily values, my numbers were 67% calcium, 65 iron, 33% vitamin D, 12% zinc, and 0 vitamin B12.

Overall, the quality of my diet is good in many ways following a vegan diet; but there are some concerns. I am concerned with my low protein intake (I am for about 55 grams/day minimum) and I haven’t been able to find soy protein in the conventional grocery stores. I went to a supplement store and purchased a plant protein powder. It was expensive and I’m realizing that it may not be possible to easily stick with non-specialty foods and get enough protein as a vegan. Today I was closest to my minimum protein goal (4 grams under). While it sounds weird to say, I think I may not be getting enough sodium either (ranging from 670-890 mg/day); but from what I can find there is no set minimum requirement. The previous two days, it has been difficult to get enough calories; but today I was right where I like to be on workout days!

I’m learning how to better work with this type of diet and my goals.

This has gotten me thinking… My goal was to do this without any specialty products; but perhaps vegans do need to use the specialty products (protein powder, aminos, TVP, etc.) to meet their body’s needs. At least, it would make it much easier to meet the body’s needs. While my food costs for this week were low (before the protein powder purchase); I think if I followed this as a permanent lifestyle, my food budget might increase to account for these products.

As a final thought, I want to hit on one of the miconceptions about veganism. I’m a talker; I talk to anyone and everyone. I stopped by the dollar store to pick up more spices and pretzels and was chatting with the cashier and mentioned that I was doing this vegan challenge. People have such misguided notions about food and nutrition… he asked me how my immunity was, since I wasn’t eating meat, wasn’t I more likely to get sick? Ummm, no. I have learned not to go to deep into nutrition unless people ask, so I just told him I was feeling fine. 🙂 And in case you are wondering, no, a vegan diet does not make anyone who is generally healthy already more likely to get sick.

Mash beans, avocado, and salsa together

My First Day Being a Vegan

Yesterday, I started the Vegan Experiment Challenge.

The day started off with a true challenge. The breakfast I had planned was mock scrambled eggs made with tofu. Unfortunately, I didn’t research any recipes before I shopped and I got the wrong consistency of tofu. This threw off my plan for my very first meal! Even with a bumpy start, my husband and I perservered and  were 100% vegan on the first day of the challenge!

I felt tired; but I don’t think that was related to diet (more a poor night’s sleep and a busy day!). I felt like I ate a lot of vegetables and the 51 grams of fiber indicates I did indeed eat many vegetables yesterday. I hit my calorie range; but was low on protein. Meal details and nutrition information follow with all the numbers at the end of this post.

Breakfast: Kashi Cinnamon Harvest cereal with almond milk, coffee with almond milk and splenda

An easy vegan breakfast

Morning snack: almonds and raisins

Easy homemade snack
Easy homemade snack

Lunch: bean burrito made from a Flatout wrap, mashed black/pinto beans, salsa, avocado, rice, cilantro,  and lime juice served with tomato and cumumber slices on the side

Mash beans, avocado, and salsa together
Put mixture, rice, cilantro, and lime juice on wrap
Vegan Bean Burrito
Vegan Bean Burrito

Afternoon snack: while I hesitate to call it a snack, I must confess to having 2 beers while relaxing on the beach in the afternoon…

Dinner: Quinoa with red/green bell peppers, red onions, garlic, pineapple, sliced almonds, and a dash of sriracha sauce served with a side of roasted vegetables (beets, carrots, onions) seasoned with canola oil, garlic powder, oregano, and red pepper flakes

Quinoa bowl and roasted garden vegetables

For those of you out there who like the numbers, here you go!

1560 calories, 209 grams carbohydrates, 51 grams fiber, 37 grams fat, 3 grams saturated fat, 0 trans fat, 0 cholesterol, 47 grams protein, and 890 milligrams sodium. For the daily values, my numbers were 73% calcium, 71% iron, 31% vitamin D, 13% zinc, and 0 vitamin B12.

All images are personal photographs. You may use them as long as you credit (my name and a link back to my Web site).